

DIY Brake Replacement: A Step-by-Step Guide for Beginners
December 15, 2023 • 2 min readReplacing your own brake components might sound daunting, but with the right guidance, it's a manageable task that can save you money and provide a sense of accomplishment. This step-by-step guide is designed for beginners, offering safety tips, tool recommendations, and a walkthrough of the process.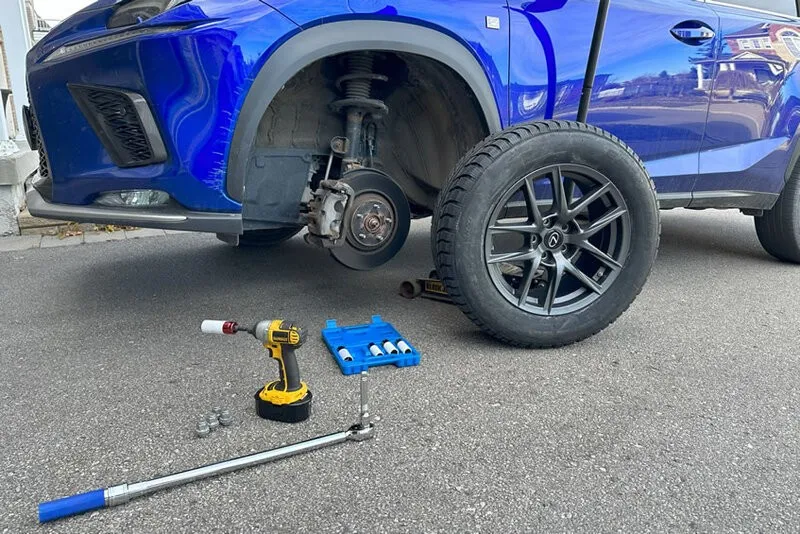
Safety First:
Before you begin, prioritize safety. Here are essential safety tips:
- Safety Gear: Wear protective gear, including gloves and safety glasses, to shield yourself from brake dust and debris.
- Vehicle Stability: Park your car on a flat, stable surface. Engage the parking brake and consider using wheel chocks.
- Allow Cooling Time: If you've been driving, allow your brakes to cool before starting the replacement.
- Safety First: Always follow safety guidelines outlined in your vehicle's manual.
Tools and Materials:
Gather the necessary tools and materials before starting:
- Jack and Jack Stands: Lift the car securely using a hydraulic jack and support it with jack stands.
- Lug Wrench: Remove the lug nuts to take off the wheel.
- C-Clamp or Brake Caliper Tool: Compress the brake caliper piston.
- Wrench and Socket Set: For removing bolts and fasteners.
- Brake Cleaner: Clean components to remove dust and debris.
- Brake Grease: Lubricate moving parts to prevent noise and ensure smooth operation.
- New Brake Components: Purchase high-quality brake rotors and pads suitable for your vehicle.
Click here to check out tools availble at AllRotors.
Step-by-Step Process:
Step 1: Lift the Car
- Use the hydraulic jack to lift the car, and secure it with jack stands.
- Remove the lug nuts using a lug wrench and take off the wheel.
Step 2: Remove the Caliper
- Locate the caliper, which is held in place by bolts.
- Use a wrench to remove the caliper bolts and gently pry the caliper off.
Step 3: Compress the Caliper Piston
- Using a C-clamp or brake caliper tool, carefully compress the caliper piston back into the caliper housing.
Step 4: Remove Old Brake Components
- Take off the old brake pads and, if needed, remove the rotor by unscrewing any retaining screws.
Step 5: Install New Brake Components
- Install the new rotor and secure it in place.
- Insert the new brake pads into the caliper bracket.
Step 6: Reattach the Caliper
- Slide the caliper back over the brake pads and secure it by tightening the caliper bolts.
Step 7: Put the Wheel Back On
- Place the wheel back onto the wheelbase and hand-tighten the lug nuts.
Step 8: Lower the Car
- Carefully lower the car using the hydraulic jack and remove the jack stands.
- Tighten the lug nuts in a star pattern to ensure even pressure.
Final Tips:
- Brake Bedding: After installation, follow the brake bedding procedure outlined in your brake component manual.
- Test Your Brakes: Before hitting the road, gently test your brakes in a safe and open area.
By following this user-friendly guide, beginners can confidently replace their own brake components while ensuring safety and optimal performance. Remember, if you're ever unsure, consult your vehicle's manual or seek professional assistance.